Get Started
Requirements
- Node.js version 20.x or above is required (v20.8.1 or above recommended).
Step-by-Step Guide
Follow these steps to contribute a reference architecture:
1. Fork and Clone the Repository
- Create a fork of the repository architecture-center.
- Clone your forked repository.
2. Install Dependencies
Run the following command to install all Docusaurus dependencies:
npm install
Ensure you are using the correct version of Node.js as mentioned above.
3. Choose an Option
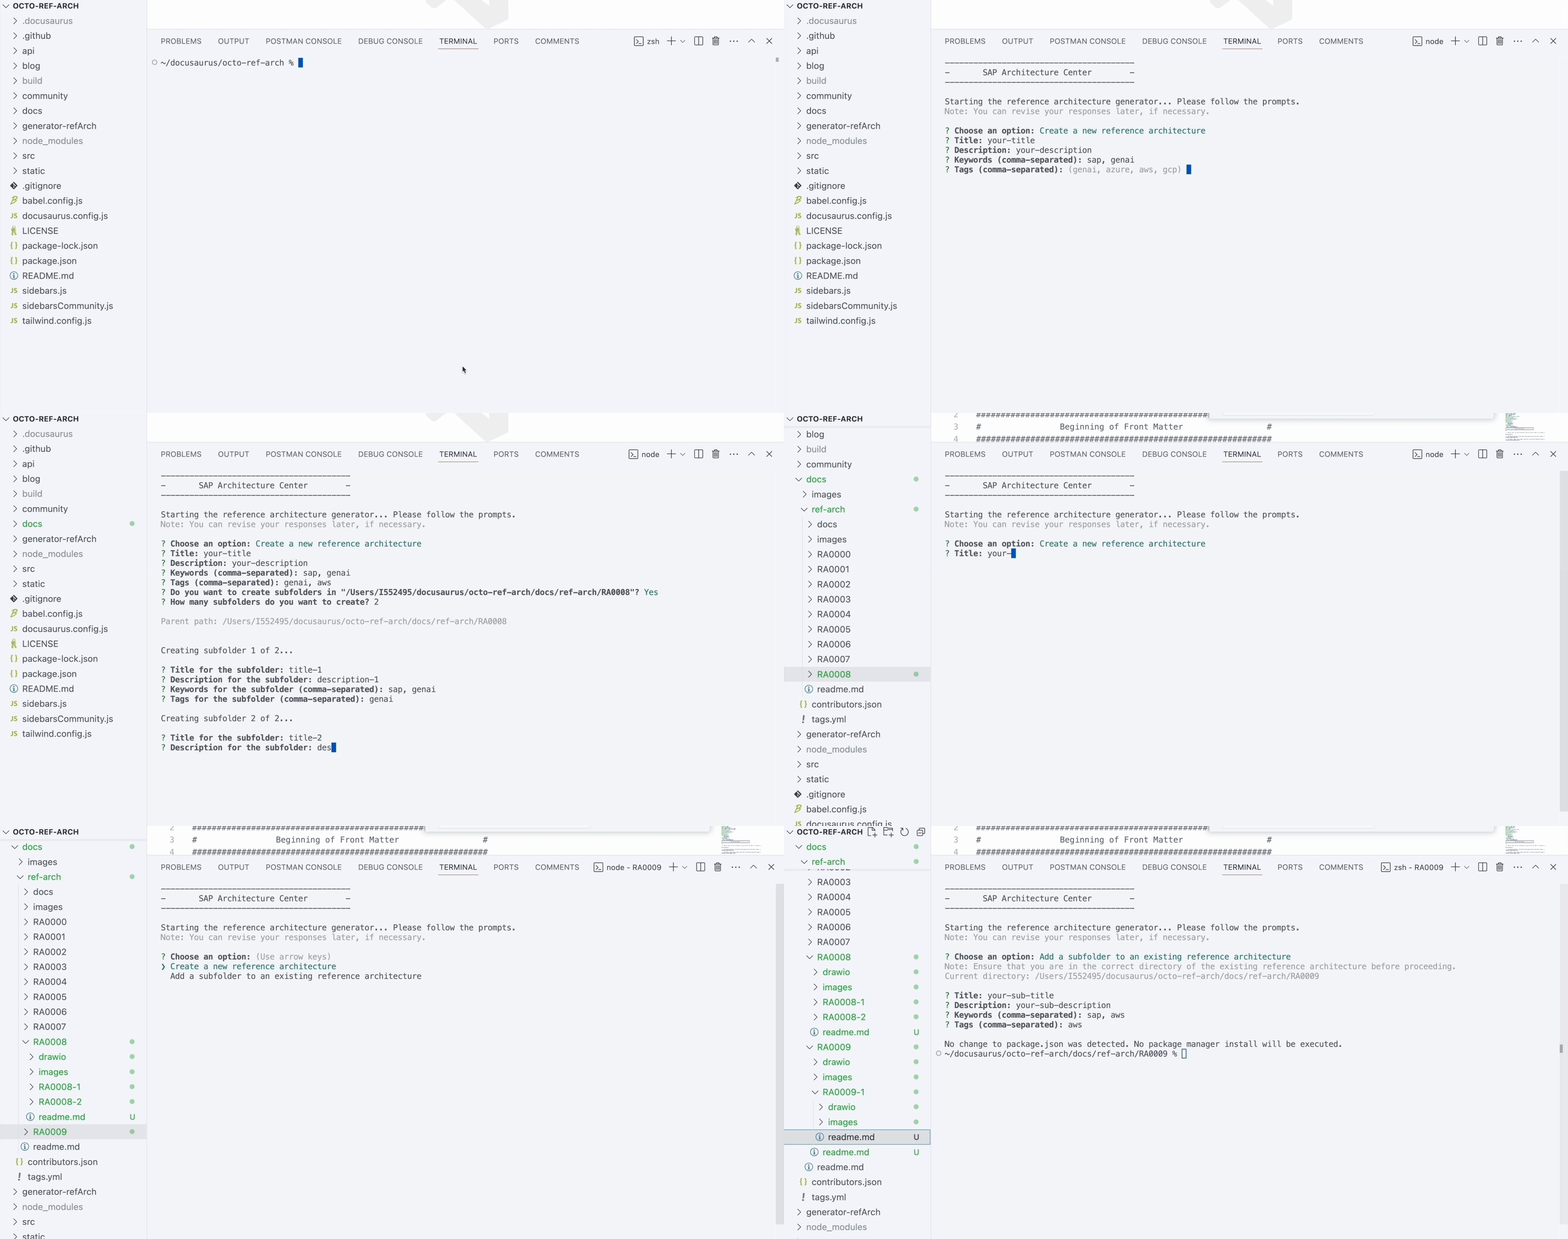
You can either create a new reference architecture or add a sub-folder to an existing one. Follow the corresponding steps below:
Option 1: Creating a New Reference Architecture
-
Run the following command to set up the CLI:
npm run setup -
Generate a new reference architecture by running:
genrefarch
Ensure that you are at the root level of the repository.
- Choose the first option: Create ref-arch.
- Fill in the prompts for title, description, keywords, and tags.
- A folder structure will be created in the
docs/ref-archfolder.
Option 2: Creating a Sub-Folder in an Existing Reference Architecture
-
Run the following command to update dependencies (this is a best practice to avoid dependency issues):
npm update -
Navigate to the folder where you want to create the sub-page, for example:
cd '/<path_to_your_repository>/docs/ref-arch/RA9999' -
Generate a new sub-page by running:
genrefarch -
Choose the second option: Create sub-page in existing ref-arch.
-
Fill in the prompts for title, description, keywords, and tags.
-
The folder structure will be created in the directory you navigated to earlier.

4. Update readme.md
- Navigate inside the
readme.mdfile within the newly created folder structure. - Update the front-matter at the top of the
readme.md.
For more details on front-matter and the necessary changes, refer to the front-matter guidelines.
5. Test Changes Locally
To test the changes locally, run the following command:
npm run start
Your project should now be running at http://localhost:3000.
6. Test Build Locally
- Run the below command to build the project. Once it finishes, the static files will be generated within the build directory.
npm run build
- To test the build locally, run the following command:
npm run serve
Make sure to set draft to false in front-matter to render your architecture after the build.
Your project should now be running at http://localhost:3000.